OCPP Service | ZJ Beny Charger - Charge HQ Configuration Guide
This guide provides step by step instructions for connecting supported ZJ Beny chargers to Charge HQ.
Please refer to our help article ZJ Beny AC Charger Compatibility for details on supported models and optional features for use with Charge HQ.
Firmware Versions
The following firmware versions have been confirmed to work with Charge HQ. Other versions may also work but have not been tested.
- 1.0.14
Safety Advice
Always follow the safety instructions provided with your charger. Always use a qualified electrician where required.
When configuring the charger, ensure that the maximum charge Amps remain correctly configured to match the circuit the charger is connected to. This step should be completed by the installer of the charger.
Step 1 - Obtain an EVSE ID from Charge HQ

- Open the Charge HQ app
- Go to Settings tab -> My Equipment -> Connect your Smart Charger
- EVSE ID: this will be entered into your smart wall charger, note down that value displayed on your app or copy it to the clipboard. You will use this in Step 5.
- Min and Max Power (A): Update these if you believe they are different to the default settings.
- Click Submit
Note: The EVSE ID is a unique identifier for your charger, it cannot be the same as any other OCPP charger that is connected to Charge HQ. For this reason Charge HQ will provide you with a known-unique value that you can set in your charger.
Step 2 - Enable configuration mode
If the charger is new and hasn’t been configured or used, skip to Step 3. Otherwise:
- Press the emergency stop button on the charger, it should remain depressed.
- Switch off the charger.
- Hold down the small reset button (next to the emergency stop button).
- Switch on the charger while holding down the reset button.
- A beep should be heard after a couple of seconds. Release the reset button.
- The charger LED should be flashing orange.
The charger is now in configuration mode and should be broadcasting a WiFi network.
Step 3 - Connect to the configuration tool
Ensure that the charger is in configuration mode - see Step 2.
This step can be done using a laptop or phone.
- Find and connect to the charger’s WiFi network. The name is eg “EVSE-221000001”
- The WiFi password defaults to “12345678”
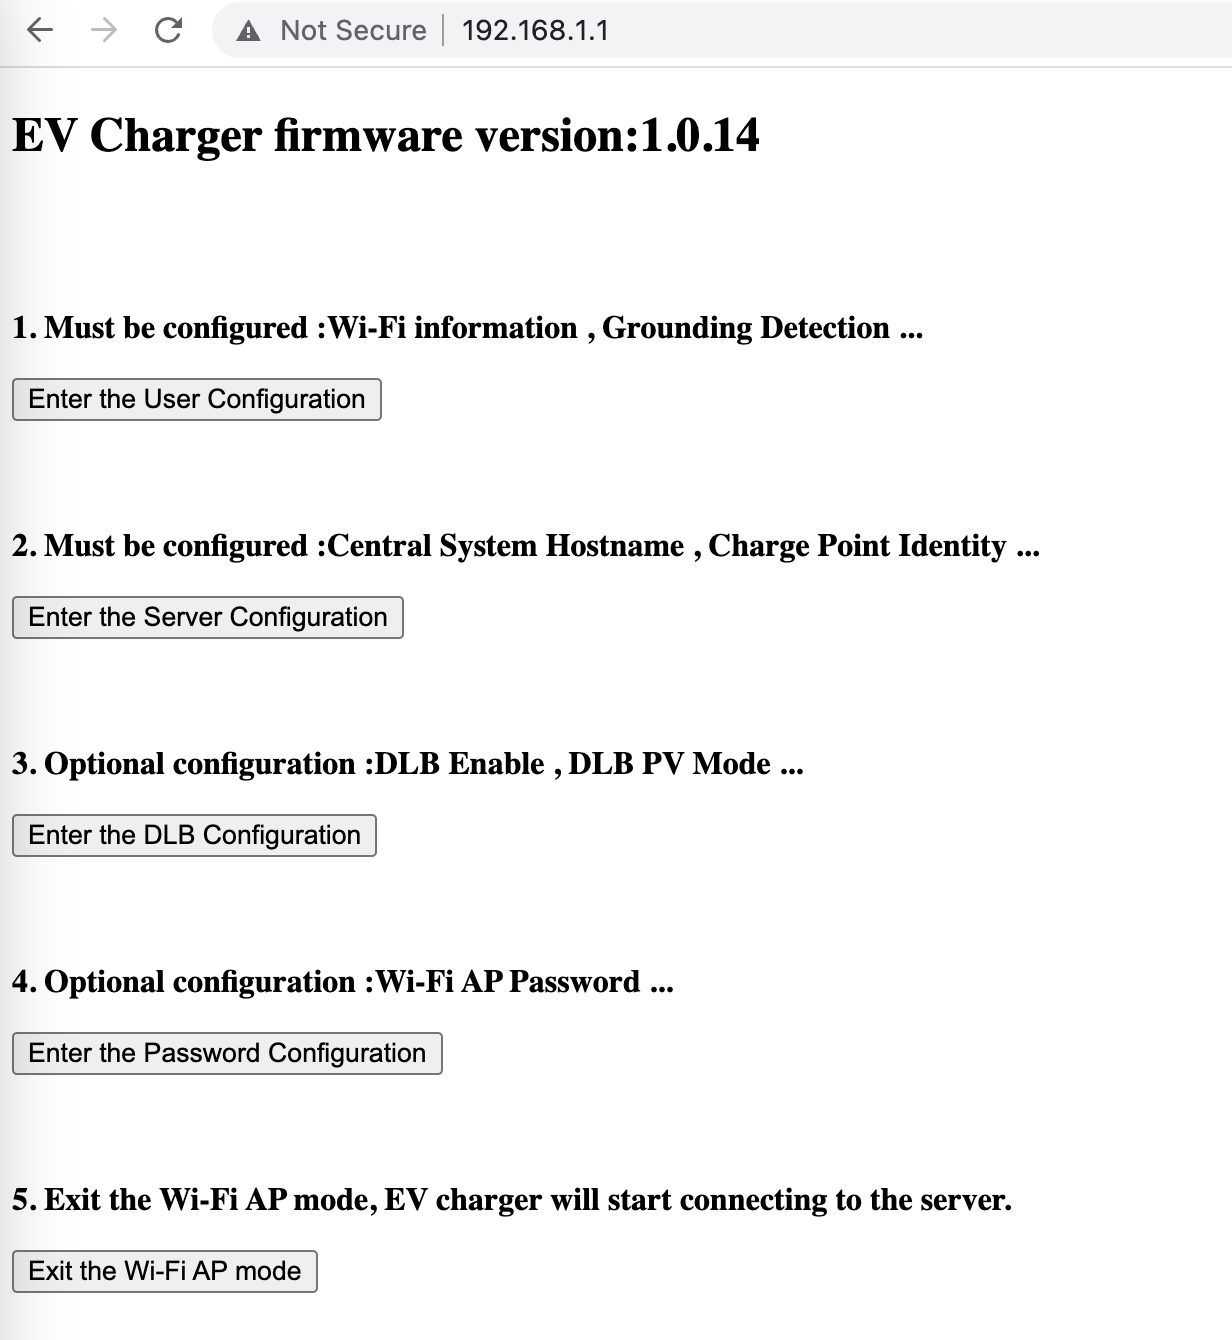
- In a browser, open the URL http://192.168.1.1
Step 4 - Connect the charger to your WiFi network
If your charger has already been connected to your WiFi network, you can skip this step.
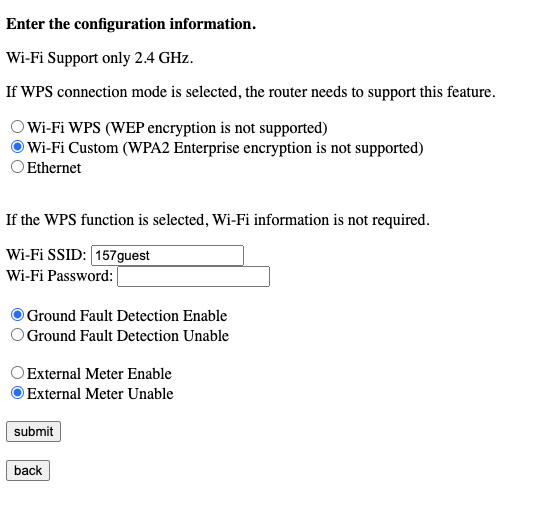
- Select “Enter the User Configuration”
- Enter your home WiFi access details.
- Check that
- Ground Fault Detection Enable is chosen
- External Meter Unable is chosen
- Click Submit
Step 5 - Enter Server information in the Charger
On the admin interface for the charger that you used in Step 3 to connect the charger to your home WiFi network:
- Selection Option 2: Central System Hostname… “Enter the Server Configuration” button
- Select “SSL Enable”
- Set the Central System Hostname to be ocpp.chargehq.net
- Set the Central system Port to be 443
- Set the Charge Point Identity to the EVSE ID you obtained from the charge HQ app in step 4, (e.g. e12345), replace the abc123 in the example below with this value.
- Select “HTTP Basic Authentication Unable
- Leave all other fields blank or as their default settings
- Leave Charge Point Model & Charge Point Vendor as set.
- Click Submit
- A beep should be heard from the charger, and a success message appears on screen.
- Click back

Step 6 - exit configuration mode
On the config home screen, select “Exit the WiFi AP Mode”
A message should appear like this:

The charger will restart and should connect to Charge HQ.
IMPORTANT!! Release the emergency stop button by twisting it clockwise all the way until it pops out. The charger’s LED should change from orange to green. Charging is not possible with the emergency stop button depressed.
Step 7 - Confirm communication with Charge HQ
Lastly - confirm that the charger is connected to Charge HQ.
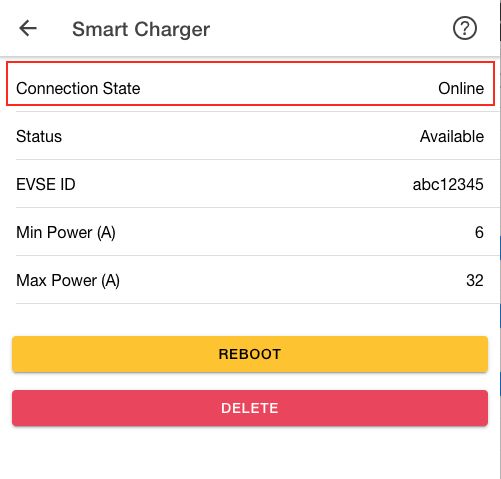
In the Charge HQ app, navigate to Settings → My Equipment → Smart Charger
Confirm that the Connection State reads “Online”
Step 8 - Confirm ability to control charging
- From the home screen of the Charge HQ app, select “Charge Now”
- Confirm that the LED lights on the charger and the display on your EV indicate the vehicle is charging.
- Confirm that charging is occurring at the configured rate (Amps)
- From the home screen of the Charge HQ app, select “Stop”
- Confirm that charging of your EV has stopped.
Trouble shooting
If your charger is configured but shows as disconnected in Charge HQ, please try the following:
- Double-check the server address and EVSE ID (see above).
- Wait 5 minutes.
- Reboot the charger.
- Wait 5 minutes.
If the charger is still "Never Connected" then try using the non-SSL connection details. In Step 5 above, enter the following:
- Select “SSL Unable”
- Set the Central System Hostname to be ocpp.chargehq.net
- Set the Central system Port to be 80
If the charger has still not connected please contact us.
Step 9 - Continue Charge HQ configuration
Charge HQ can now control your ZJ Beny wall charger.